Ruckus Last updated: 2022-07-20
1. Ruckus Unleashed AP
-
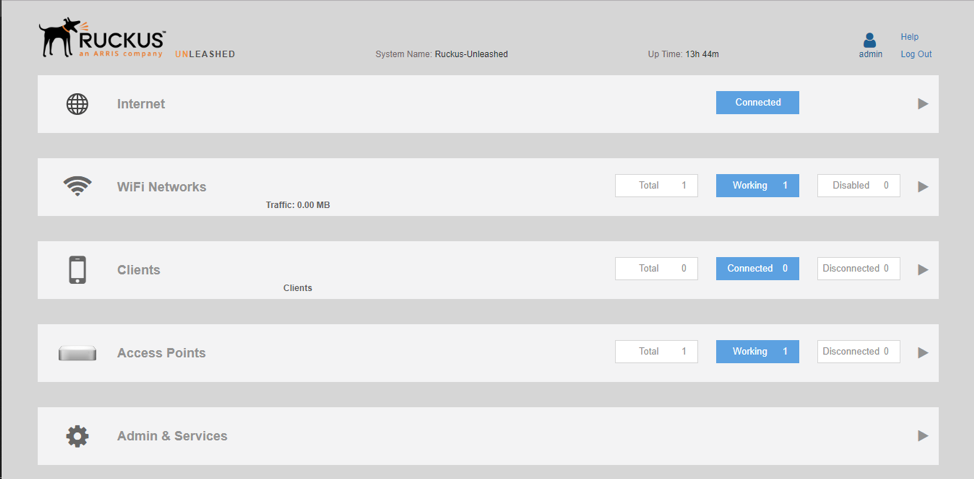
Đăng nhập vào Ruckus
Click vào hình để phóng to -
Tạo RADIUS Server
-
Vào Admin & Services Services AAA Server tab Authentication Servers Create New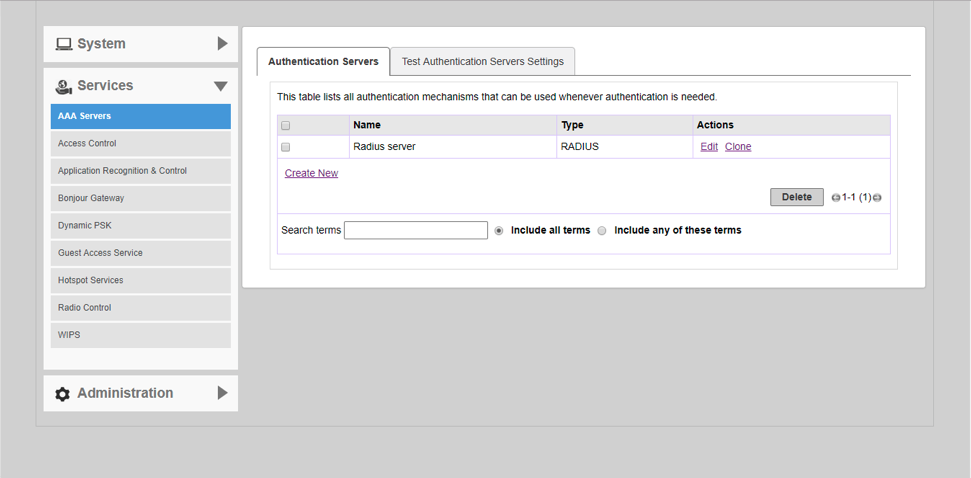
Click vào hình để phóng to -
Nhập các thông tin:
- Name: tên RADIUS Server
- Type: RADIUS
- IP Address : ip của RADIUS Server
- Shared Secret : mã chứng thực nhập genexwifi123
- Confirm Secret : xác nhận mã chứng thực nhập genexwifi123

Click vào hình để phóng to
-
-
Sau khi tạo xong RADIUS Server
-
Vào Admin & Services Services Hotspot Services tab Hotspot Services Create New -
tab General điền vào các thông tin:- Name: tên Portal
- Login Page: paste vào link đã copy ở “Wifi NetWork” trên cloud
- Session Timeout: thời gian sử dụng cho mỗi lần truy cập SSID
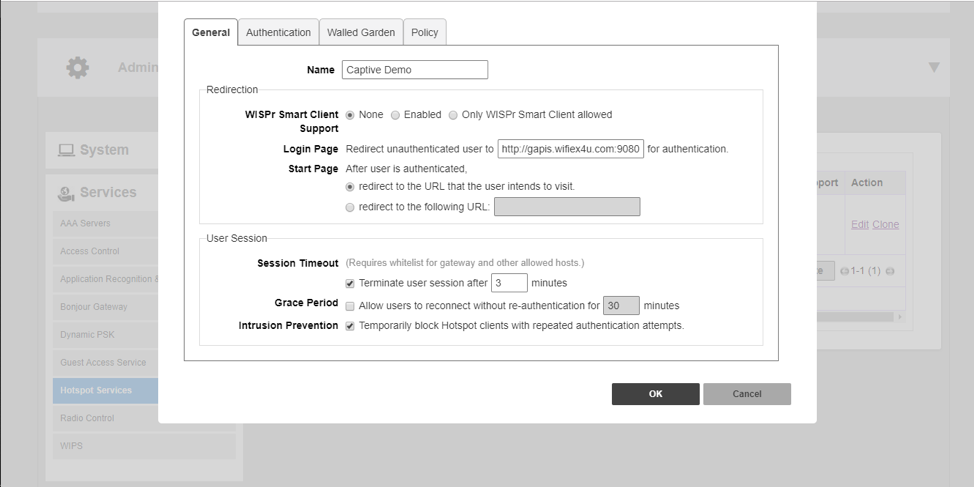
Click vào hình để phóng to -
tab Authentication điền vào các thông tin:- Authentication: tên RADIUS Server đã tạo ở bước trên
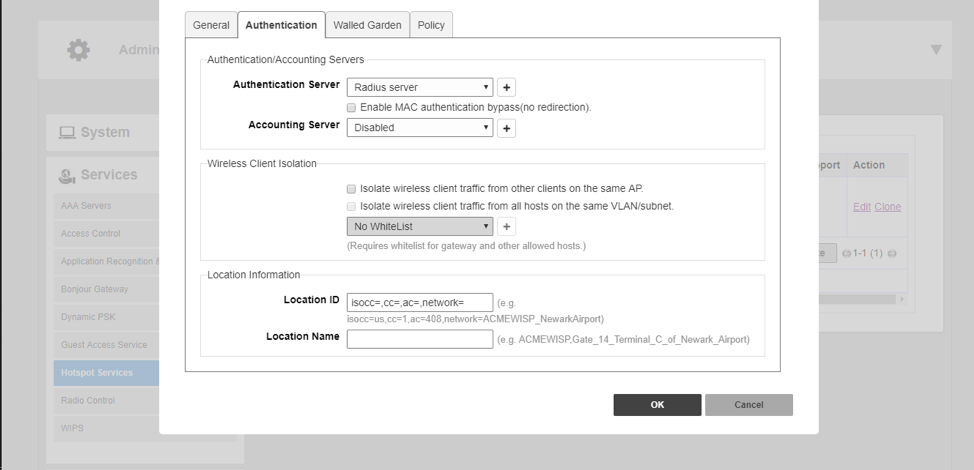
Click vào hình để phóng to -
tab Walled Garden- Chọn "Create New" để thêm các ip cho phép pass
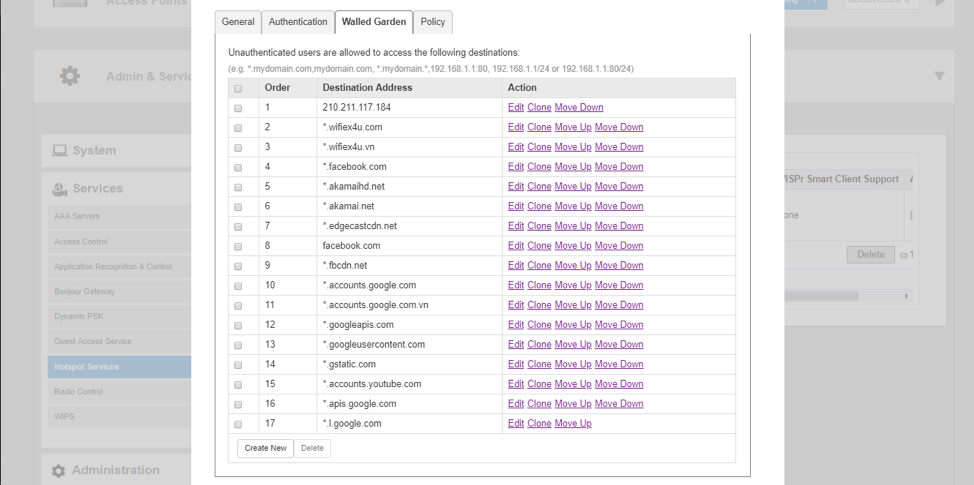
Click vào hình để phóng to
-
-
Sau khi đã tạo xong Portal tạo SSID
-
Vào WIFI Networks click Create
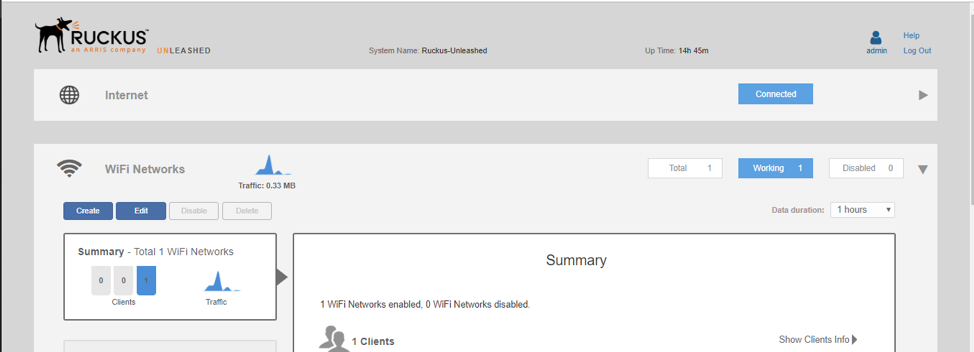
Click vào hình để phóng to -
Điền vào các thông số sau:
- Name: tên SSID
- Usage Type: chọn Hotspot Service
- Hotspot Services : chọn tên Portal đã được tạo ở bước trên

Click vào hình để phóng to -
Để Upload/Download Limit: vào Show Advanced Options Access Control
- Enable Per SSID Uplink: enable lên và tùy chỉnh số mbps
- Enable Per SSID Downlink: enable lên và tùy chỉnh số mbps
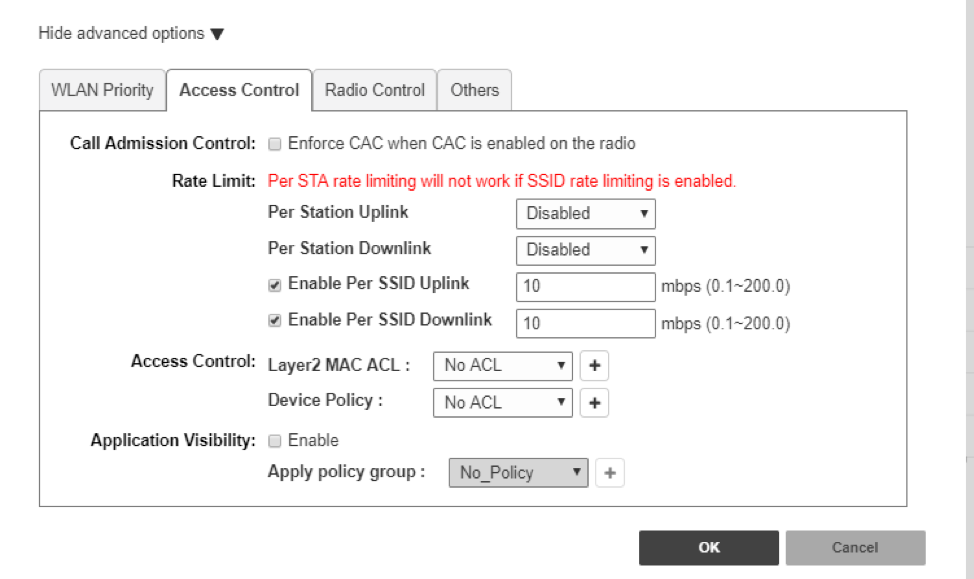
Click vào hình để phóng to
-
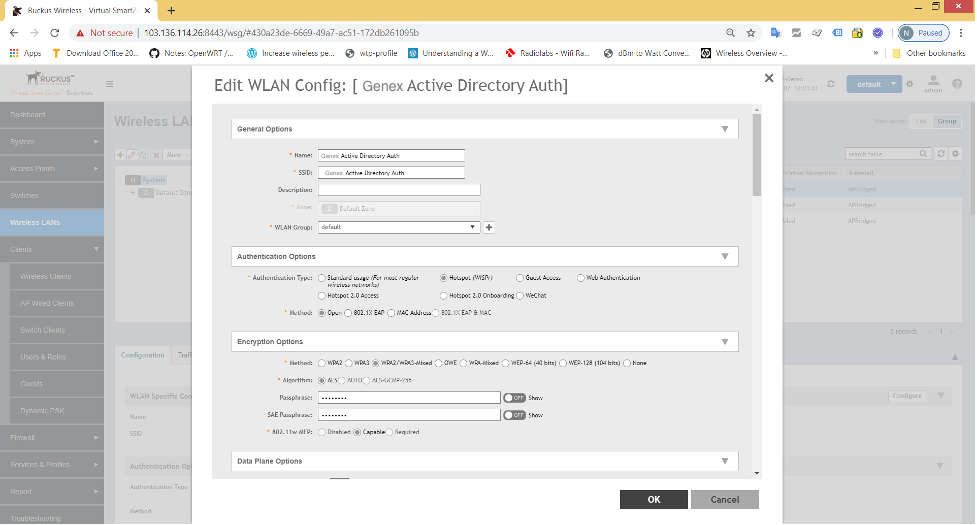
2. Cấu hình Zone Director hoặc Virtual Smart Zone
- Phần Authentication Options
- Chọn (WISPr) mode
- Phần Hotspot Portal
- Hotspot (WISPr) Portal: tạo 1 trang portal page mới, và đặt tên theo bạn muốn
- Authentication server: tạo RADIUS Server profile trỏ về RADIUS Server của GENEX
- Accouting server: tạo RADIUS Server profile trỏ về RADIUS Server của GENEX
- Bypass CNA: chọn Off
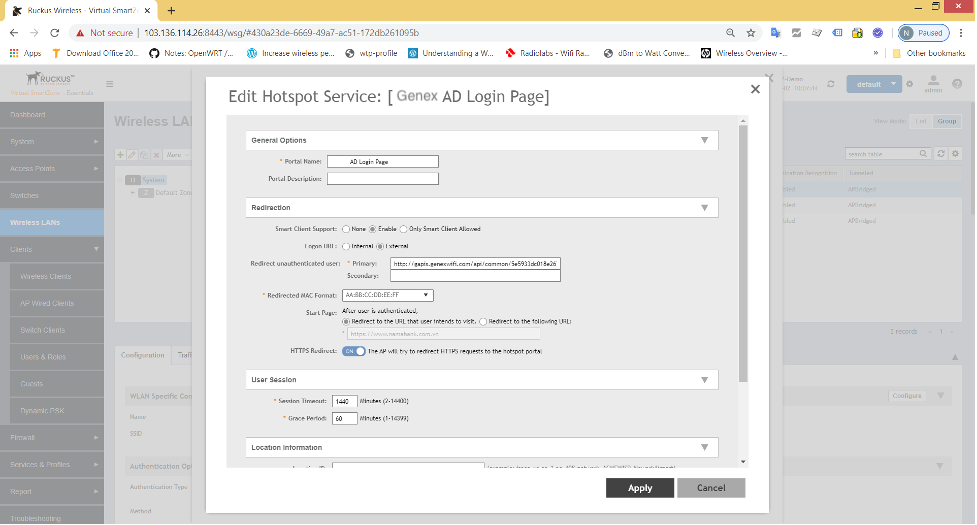
- Phần Redirection
- Redirect unauthenticated user: copy đường dẫn từ giao diện Wifi Marketing Platform và paste vào đây
- Các setting khác thiết lập như hình
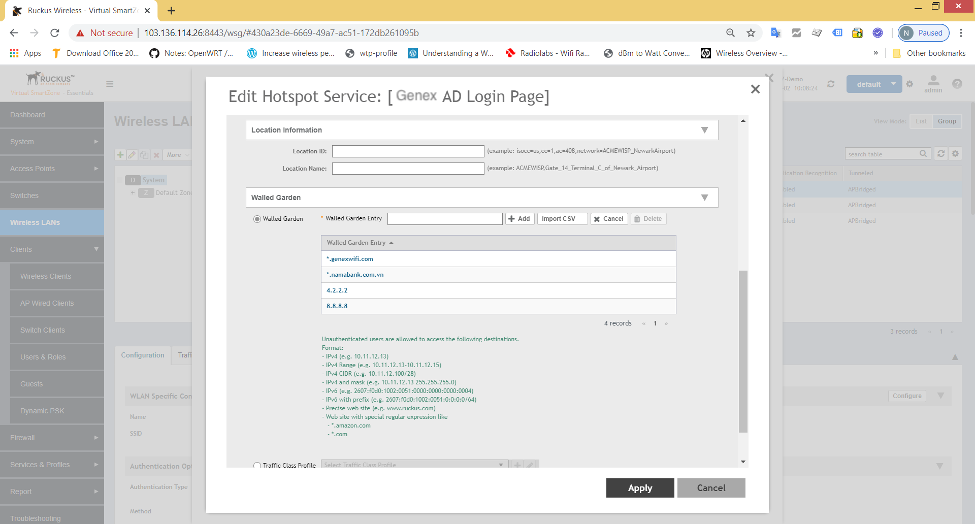
- Phần Wall Garden
- Thêm “*.genexwifi.com” và IP “210.211.117.184” (IP máy chủ GENEX) và các DNS Server như “4.2.2.2” và “8.8.8.8” vào danh sách này
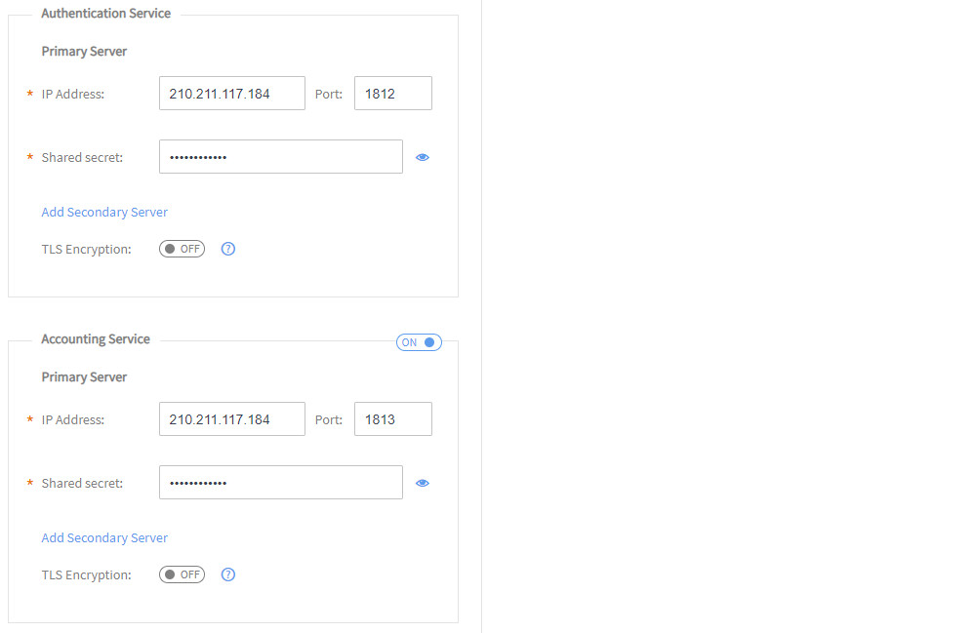
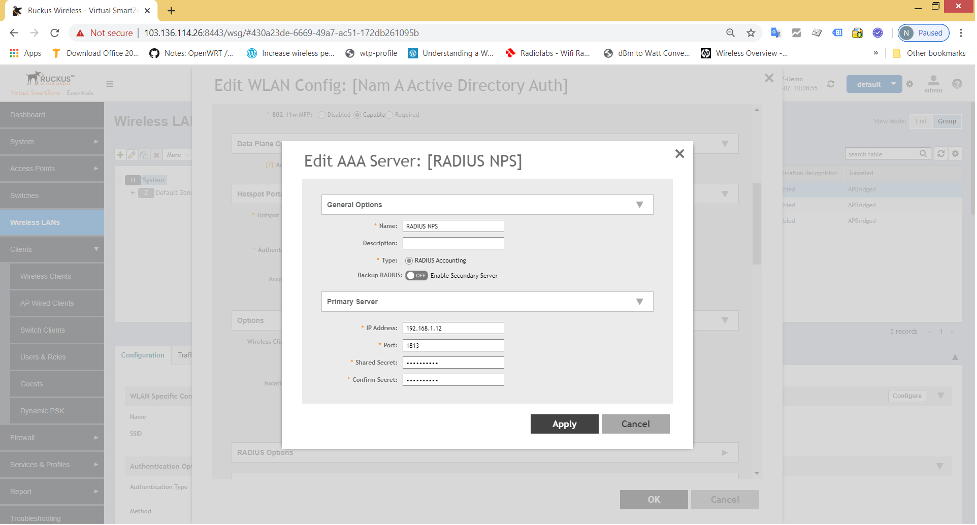
- Phần AAA Server -> Primary server (Authentication server)
- IP: 210.211.117.184
- Port: 1812
- Shared Secret: genexwifi123
- Phần AAA Server -> Primary server (Accouting server)
- IP: 210.211.117.184
- Port: 1813
- Shared Secret: genexwifi123
Bước 1. Wireless LAN

Bước 2. Edit setting của trang Hotspot (WISPr) Portal Page
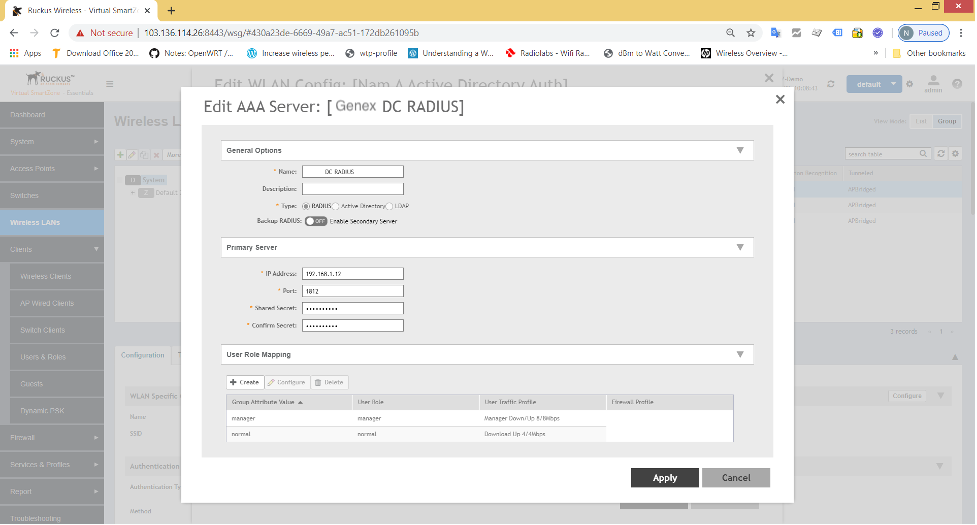
Bước 3. Cấu hình RADIUS Server
3. Public Cloud
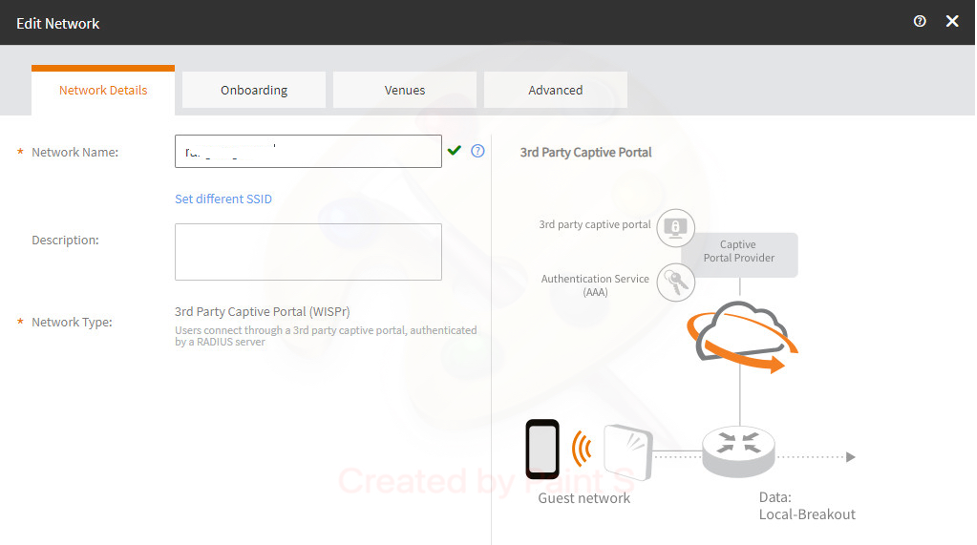
- Phần Network Details
- Network Name: nhập tên sóng Wifi (SSID Name)
- Network Type: chọn “3rd Party Captive Portal (WISPr)”
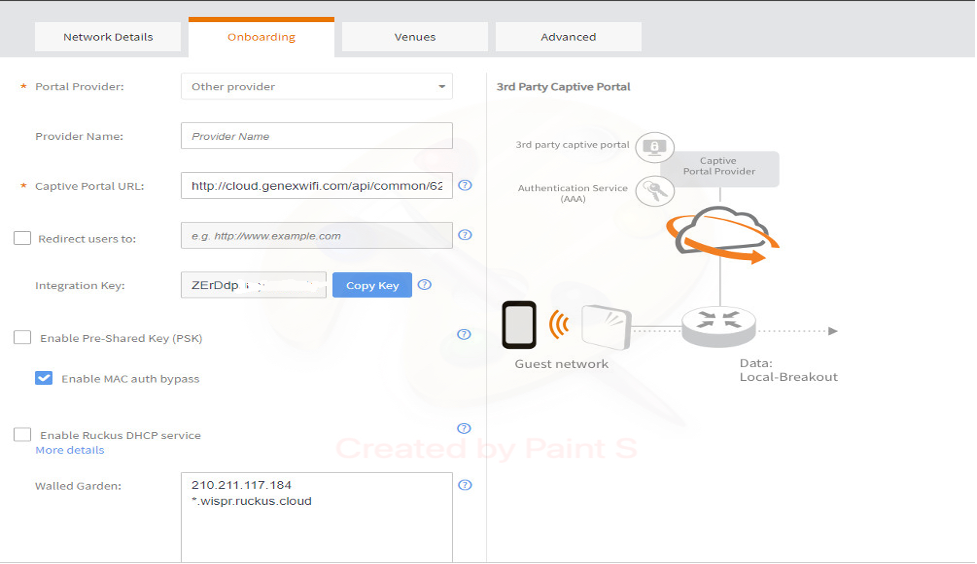
- Phần Onboarding
- Portal Provider: other provider
- Captive Portal URL: copy đường dẫn External URL từ giao diện Wifi Marketing Platform (*)
- Chọn “Enable MAC auth bypass”
- Phần Walled Garden: nhập vào “210.211.117.184” và “*.wispr.ruckus.cloud” như hình
- Các setting khác thiết lập như hình trên
- Phần Authentication Service
- IP: 210.211.117.184
- Port: 1812
- Shared Secret: genexwifi123
- Phần Accouting Service
- IP: 210.211.117.184
- Port: 1813
- Shared Secret: genexwifi123
Bước 1. Cấu hình Network
Bước 2. Cấu hình Onboarding
Bước 3. Cấu hình RADIUS Server